You’ve made it. The hustle and bustle of the holiday season is behind us and you can settle back into your hobbies and interests with newfound vigor. If one of those hobbies is canning, then it might be time to open those jars of preserved produce and make some delicious meals or snacks.

In this article we’ll be walking through a variety of options available to you with your canned goods. After all, what better way to celebrate the new year than with fresh ideas and a full stomach!

Charcuterie Board

Charcuterie boards are an increasingly popular option for people who love both canning and snacking. Combining various jams, vegetables, nuts, meats, and cheeses on a plate will never get old.

Some delicious options for charcuterie boards are pickled items such as okra, or the jams and jellies that you have prepared. Pair these with smoked meats like prosciutto and creamy cheeses like brie to make a perfect plate. Not interested in the meats or cheeses? You can always have a vegetable and fruit platter instead!

Pickled Veggies in Sandwiches

This is a great way to spice up some of your favorite meals. Pickled veggies provide a wonderful acidity in foods that adds a complexity and zest to any sandwich.

For example, try pickled peppers on your next sandwich.  If you want something a little more experimental, try adding pickled onions to your next grilled cheese masterpiece.

Do you have a favorite sandwich recipe featuring your canned foods? Share it to our Facebook page!

What’s for Dinner?

Here’s a delicious meal from the Mrs Wages® vault of recipes. All four of these dishes are made using canned vegetables or fruit.

Appetizer: Reuben Empanadas

Canned Ingredient: Mrs. Wages® Kosher Dill Pickles

Entree: Gumbo with Pickled Okra

Canned Ingredient: Mrs. Wages® Pickled Okra

Side 1: Kosher Dill Pickle Cornbread with Pickle Butter

Canned Ingredient: Mrs. Wages® Kosher Dill Pickles

Side 2: Cranberry Applesauce

Canned Ingredient: Mrs. Wages® Spiced Apple Mix

Fall is in the air. You can almost smell it, save the stuffy nose – but you can feel it too! The crisp thin air, the crunch of the leaves, that smokey smell on the wind. But inside the home there’s a difference too. The air is warmer and closer, there’s the smell of baking, and of course the sound of football and excitement. 

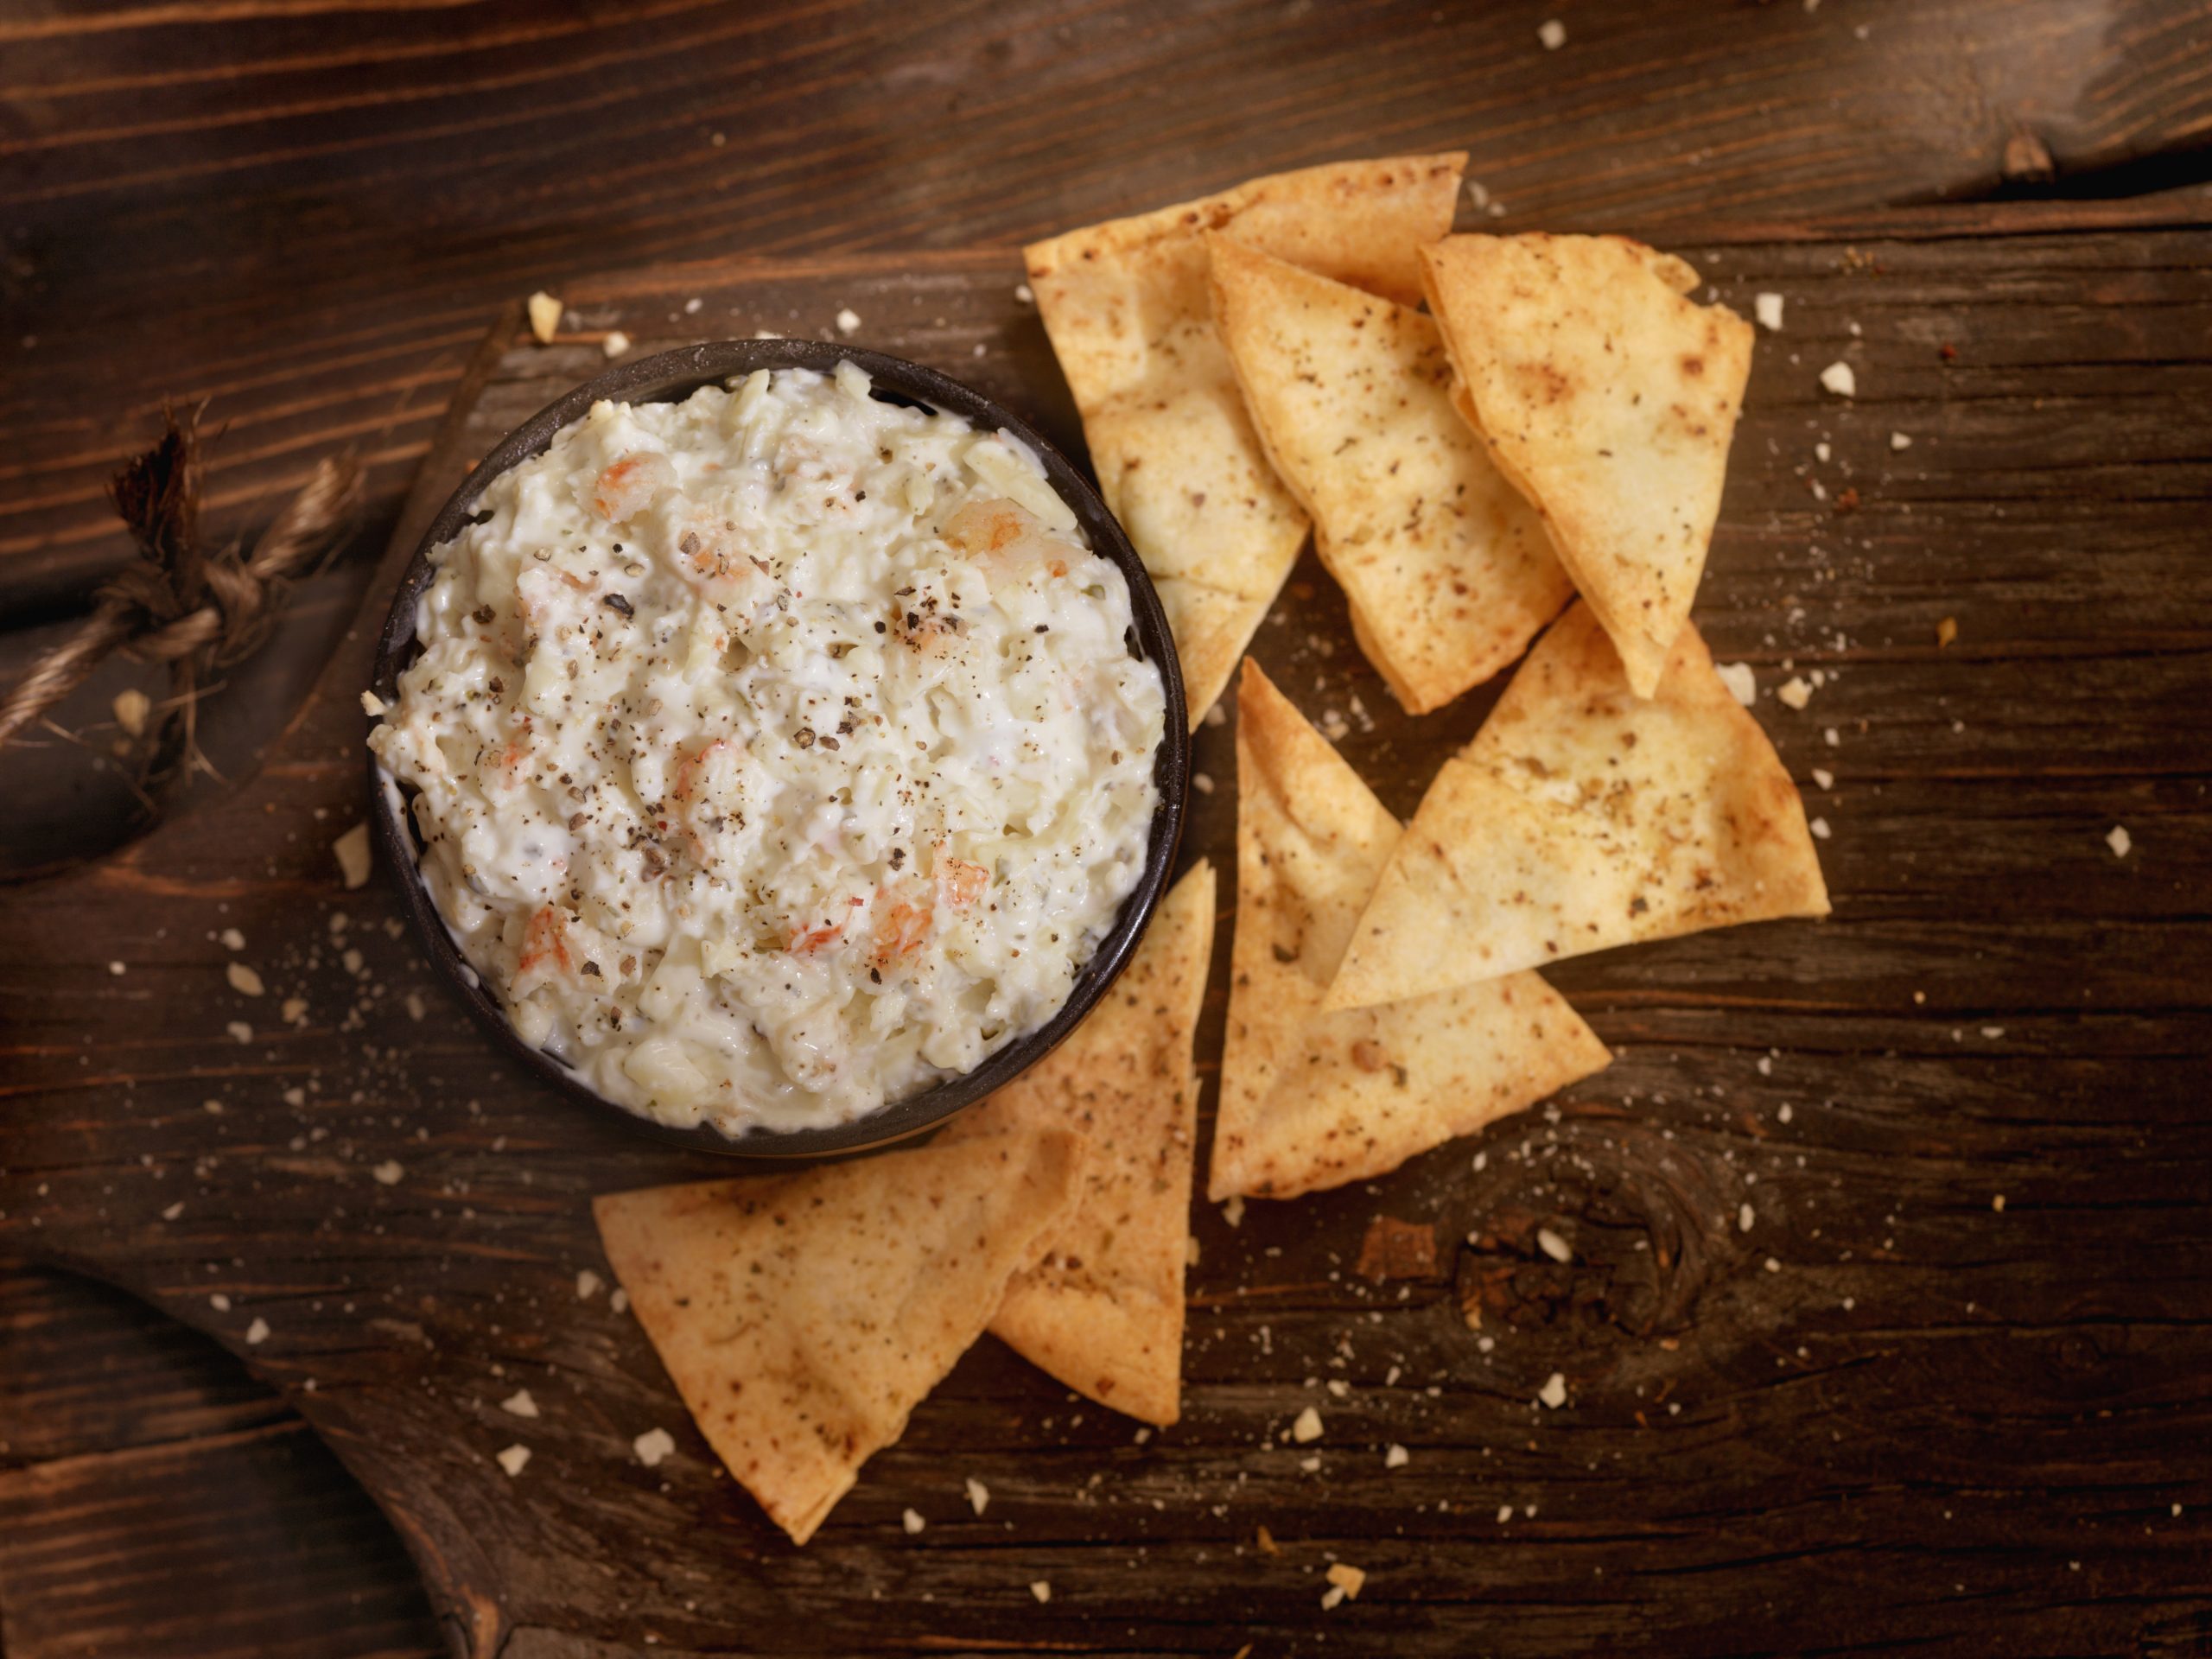
Sometimes a game or two on a Sunday afternoon can be fun, but when guests get involved it can be difficult to keep everybody fed and happy. Entertainment isn’t the issue here, the eyes are glued to the play-by-play action, but what about snacks? Here at Mrs. Wages® we have no shortage of good ideas. Here are a couple of ideas for snacks no matter the day of the week. 
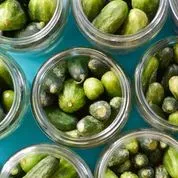
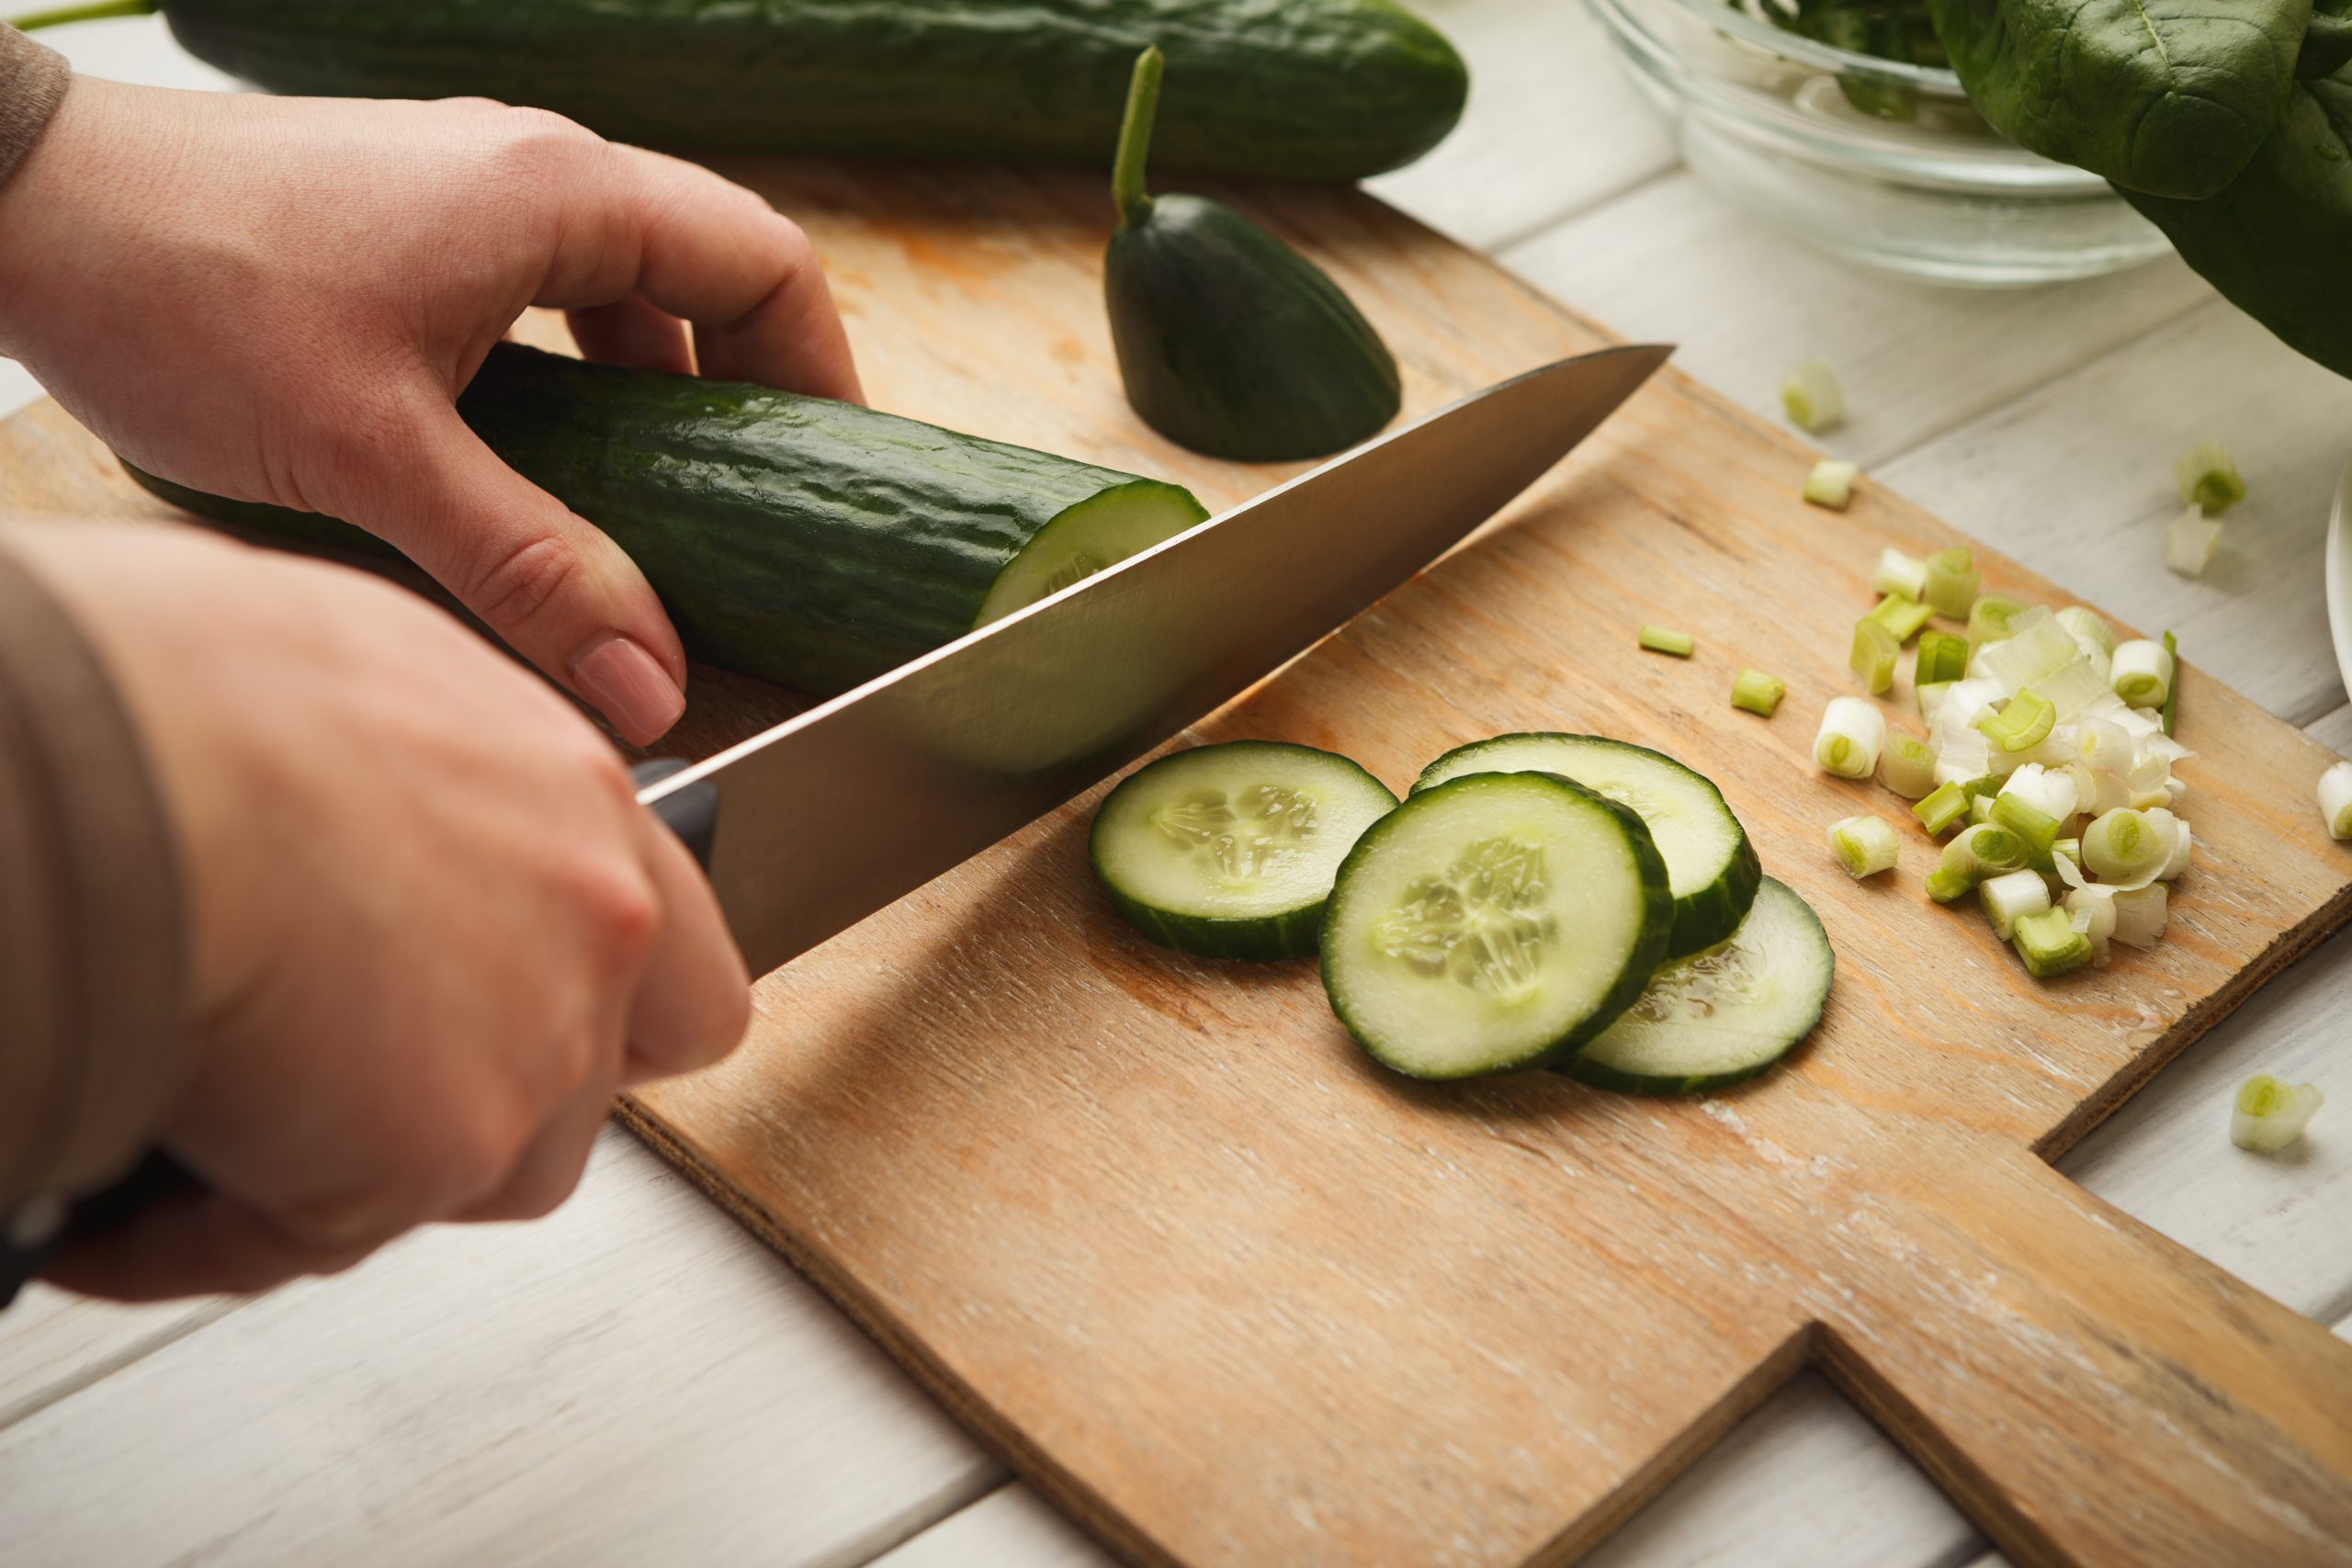
Build Your Own Pizza Thursday 

For Thursday night, keep it simple. Grab some Mrs. Wages® Pizza Sauce Tomato Seasoning Mix, personal sized pizza crusts, part skim mozzarella, and some of your family’s favorite toppings. Just set everything out on the counter and let everybody go to work on assembling their own mini pizza! These smaller pizzas are usually ready to go in just 10 minutes!

Looking for a snack rather than a meal? Our aptly named Football Pizza Bites are perfect for the occasion. With a short ingredient list and a speedy cook time, these treats are simply delicious for any game. 

Dips and Salsa Sunday 

Sunday is the ultimate day of relaxation. Breathe a sigh of relief, put your feet up, and enjoy some easy snacks and a good game. 

What’s easier than a delicious dip tray? Here at Mrs. Wages® we have a fantastic assortment of instant mixes for you to try, like our All Natural Guacamole Seasoning Mix!  Or maybe you’re feeling cheesy? Try our Pepper Jack Queso Cheese Dip Mix. Need something for dipping veggies? Our various ranch dressing and dip mixes are just the thing for you! Finally, the perfect capstone to this dip tray, a good salsa. Try one of our many salsa mixes.

Looking to step up your game? Here are some of the best appetizers! The Cheesy Beer Dip is a pub inspired snack perfect to partner with some pretzel bites. Or try the  Creamy Pickle Salsa Dip which satisfies any craving. What more do you need in a perfect snack?


So there you have it, some easy and delicious ideas to try at your next football gathering. If you’ve tried all of these ideas but want more, check out our recipe page. Thanks for stopping by. 

Don’t you just love pickles? The tangy, yet slightly sweet flavor, makes for the perfect balance in taste. The crispy texture compliments your sandwiches, burgers, meats and makes them much more enjoyable.

With so many uses for pickles in various foods and recipes, it may be beneficial to learn how to make bread and butter pickles. If you store them properly they will last throughout the year.

Whether you are new to canning pickles or have been doing it for a while, here are a few tips to help you improve your canning process:

1. Use An Ice Water Bath

One of the best ways to prepare crispy pickles is to soak your cucumbers in an ice water bath for nearly five hours before starting the pickling process. Place water and ice in a large container and add the clean pickling cucumbers into it, letting them soak.

To ensure a successful process, refill the ice frequently to keep the water bath cold throughout the process. You can even refrigerate the container during the soaking period. After 5 hours you can drain the water.

2. Saltwater Brining

Use the saltwater brining process to remove the excess water from your fresh cucumbers. Placing these in the brine overnight will make them more flavorful before the pickling process. It also prevents the development of possibly harmful microorganisms that also impact the flavor of the finished pickles.

As a result, you must use brine before you pack the pickles into the jars and cover them with the pickling liquid.

3. Use The Right Salt

Once you have thoroughly washed your onions and cucumbers and sliced them finely, you must be sure to use the right salt for their brining process. The anti-caking agents and iodine in regular table salt can darken the pickles and leave you with a clouded jar.

If you use pickling salt, also known as canning salt, the pickles will retain their color.

4. Use Proper Canning Equipment

Make sure you use the right equipment instead of using random pots and containers to make the canning process easier. Here’s what you need:

  •   Pint Jars
  •   Water bath canner
  •   Lids and bands
  •   Canning tools like jar lifter, lid lifter, funnel, canning ladle, bubble popper
  •   Basic kitchen utensils like a large bowl, saucepot, small pot, knife, cutting, towels

5. Sterilize The Jars

It is essential to sterilize all the jars you use for canning to kill any bacteria that may be present.

Set up your water bath canner and place the canning rack on the stove. Sterilize your jars by washing them, placing them in the canner, adding water, and boiling them for ten minutes.

6. Use Crisp Pickling Cucumbers

It is best to use freshly harvested and crisp pickling cucumbers instead of the normal waxed ones. Pickling cucumbers are thin-skinned cucumbers, and are explicitly used for pickling and processing. They allow the picking liquid to penetrate the cucumber, which is difficult with the wax in an average cucumber.

Conclusion

Pickles are an absolutely delightful addition to different foods that add a depth of flavor to any dish and offer unique textures. You can enjoy bread and butter pickles throughout the year when you use the proper methods and tips.

Head over to Mrs. Wages®  for more canning recipes and learn how to store various foods properly.

Some vegetables can be grown all year long. By planning well, you may find that you have plenty of vegetables to can and enjoy.

Here is some information on planting times for the vegetables that people most often can.

1. Green Beans

Green beans require warm soil temperatures since they are frost-sensitive. You can plant your seeds outdoors anytime after the last spring frost. You can also choose to begin seeds indoors, about one month before the projected last frost. Transplant the seedlings approximately two weeks after the last frost.

Very cold soil can result in poor germination or damage green beans. Similarly, temperatures higher than 80 degrees Fahrenheit result in tough pods, due to excessive fiber tissues.

As a result, it is best to plant green beans during the springtime when temperatures range between 50 and 85 degrees Fahrenheit, for a successful production.

2. Corn

It is best to plant corn at a soil temperature of around 60 degrees Fahrenheit as it is a warm-season vegetable. It can take about sixty to one hundred days for corn to be ready for harvest, depending on the type/variety and the temperatures during the growing period.

The ideal temperature for corn growth is between 60 and 95 degrees Fahrenheit. If seeds are planted in wet or cold soil they may not germinate. Consequently, it is best to wait for at least two weeks after the last spring frost, before planting corn seeds.

3. Peas

Peas have a limited growing period, and it is best to plant them in early spring for their easy maturation during relatively cool weather. The months of February, March, and April are ideal for planting in most US locations. In some warmer areas, you can also grow peas as a fall crop, but they have shown a higher success rate as a spring crop.

As a general practice, you should sow seeds between four to six months prior to the last frost of spring, so that the soil is cool. A  soil temperature of at least 60 degrees Fahrenheit and less than 85 degrees Fahrenheit is ideal for planting. Those planted at cooler temperatures will germinate more slowly.

4. Carrots

Carrots are cool-season crops and are sown in soil temperatures of about 50 degrees Fahrenheit during the spring season.

Seed germination usually takes place at around 55 to 75 degrees Fahrenheit for an optimal crop to be harvested in the summer. It is also possible to grow carrots in the fall, where temperatures usually stay over 32 degrees Fahrenheit in non-freezing soil. This provides an opportunity to harvest them in the winter. This is a great option for those in the southern states where summer temperatures may be too hot.

5. Tomatoes

Tomatoes are plants that grow best in warm weather. Frost can destroy tomato plants so it is important not to plant them too early. Tomatoes won’t grow well in any temperature below 50 degrees Fahrenheit. A good time to plant is when nighttime temperatures consistently stay above 50 degrees Fahrenheit.

This temperature gives them time to mature so they can set fruit at around 55 degrees Fahrenheit. You can check the soil temperature before planting your tomatoes, as it should ideally be about 60 degrees Fahrenheit.

Tomatoes are a popular vegetable used in canning of spaghetti sauce or salsa.

6. Cucumber 

Cucumbers thrive in warmer weather. Planting them at the wrong time can result in a lack of growth because they do not tolerate the cold well. In most climates the ideal planting time for cucumbers is between April and June. However, in some warmer areas you may consider planting cucumbers in February or March. It is advised that cucumber crops are only planted once temperatures are likely going to stay above 65 degrees Fahrenheit, soil and air.

Once your cucumbers have grown to full size be sure to harvest them promptly. This will ensure that your plants keep producing and help to achieve an optimum crop. Hopefully you will have plenty of cucumbers to can.

Try pickling your cucumbers. Add vinegar and some seasonings to your canned jar of cucumbers. The results will have you reaching for more!

Canning is a great way to store the vegetables you grow in your garden. In order to achieve an optimal crop and have plenty of produce to can, the correct planting times must be researched and considered.

Mrs. Wages products have been taking the hassle out of cooking for over 70 years! We do the work, you take the credit. For more canning guidelines and recipes, head over to Mrs.Wages.

Did you know that you can make jam from frozen fruits?

To preserve the freshness of your garden harvest, seal and freeze it for later use, especially in the off-season.

But what if you are left with a massive amount of frozen fruits that you can’t possibly process?

Make homemade jam from the frozen fruits and enjoy a dose of lusciousness when the fruit is otherwise unavailable. Fall and winter are the perfect time to make jam from summer fruits such as berries. This is because the extra heat from the jam-making process brings comfort on such cold days.

Let’s find out how you can make a fine jam from frozen fruits.

Thaw Your Frozen Fruit

Frozen fruits can be used in the same way as you use fresh fruits, but you need to thaw them first and then proceed with the recipe. One thing to note,  ensure that you don’t leave the frozen fruit out to thaw several hours.

The longer you let the fruit sit, the more juice will flow out of them that later affects the jam’s thickening process.

Prepare Your Canning Equipment

You need to prepare a water bath canner for canning your fruit jam before you start to cook your jam. Fill the canner with clean hot water and ensure that it is at least half full. You need enough water to make sure that the water level is 1-2 inches over the jar’s top when they are added to the water.

Heat the water to about 180o F so that it is just simmering when you add the jars later.

Start Cooking Your Jam

Mrs. Wages® also offers a no cooking solution for making jams.  Our No Cook Freezer Jam Fruit Pectin is ideal for health conscious or low-carb diets, our pectin requires no added sugar and no cooking – even your kids can join in the fun!

If time and tradition are your choice follow our cooking guidelines here!  Use a medium saucepan and add the frozen fruits, sugar, citrus juice, and zest in it. Stir thoroughly and start adding the packaged pectin slowly to the water. You can add more frozen fruits to the jam for a softer jam, but if you are looking for a firm jam, you can take out some quantity of the frozen fruits.

Keep the saucepan on medium heat and let it cook uncovered. When the fruit starts to soften, use a potato masher or a fork to crush the berries. You need to do this to ensure that you don’t end up with pulpy bits or skin in a jam.

Remove the mixture from heat.

Start The Canning Process

Start ladling the jam in the canning jars but make sure that you leave some headspace, usually the top 1/2 inch, unfilled. Wipe the rim of each jar with a cloth, place the lid, and shut it tight.

Place the filled jars into the water bath canner with a jar lifter and see that you do not tilt the jar so that the jam gets stuck under the lid. Process the jars of jam for the designated amount of time, per Mrs. Wages instructions, in the water bath and then remove them and let them cool.

Make sure that the jam is cooled completely before you open the jars. The jam is now ready to be stored, or it can be eaten by spreading over a slice of freshly baked bread.

In Conclusion

If you are overwhelmed by frozen fruit that you don’t know what to do with, making a jam is a perfect and delicious solution.

Now that you know that making jam from frozen foods is possible, clean out your freezer and get to it before summer comes around again.

For more recipes, guidelines for making jams and pickles, or information on canning, head over to Mrs. Wages.

You might have been storing, canning, and preserving for quite a while, but there is always a new trick to learn when it comes to keeping your favorite foods and staples safe.

We have compiled five necessary storage and harvesting tips for every canning enthusiast interested in preserving their home-grown stock of fruits and vegetables.

Preserve Fresh Fruits Into Jams and Jellies

Who doesn’t like to eat home-made jam with toast all summer long? Not only does it serve as a perfect breakfast and treat, but you can also preserve your summer fruit as a delicious jam to enjoy all year long!

When you preserve your fruit, adding additional pectin and sugar can enhance the jam’s taste and structure while retaining its fruity freshness.

However, if you are new to canning and preservation, it is best to start with the basics and go for easier techniques like freezing and drying the harvest.

Freeze Your Vegetables

Freezing is the easiest of all. The best time to freeze your fruits or vegetables is right after you’ve harvested them. Wash them thoroughly and pack them into a press and seal bag to make sure they don’t “freezer burn.”

Some fruits like apples and spinach may need to be blanched before you put them in the freezer. This reduces the enzyme action in these foods which can help them retain their color and flavor. Boil your vegetable or fruit in a ⅓ cup of water and then immediately transfer into ice-cold water before drying and putting them in the freezer.

Storing Root Vegetables In A Cellar

Turning your crop varieties into jams, pickles and condiments is a great idea. But some vegetables can neither be frozen nor turned into a jam, for example, your root vegetable harvest!

If you have a basement or access to any other cool, dry storage environment, store the beets, broccoli, and potatoes there, and they’ll last you all winter!.

Canning

Canning your garden harvest certainly takes extra effort compared to freezing or drying your harvest; however, it is a method that can keep your food fresh for a longer time. Remember to follow the best methods for each crop. All of Mrs. Wages products recommend water bath as the primary method of canning.

Dry Your Harvest

The most popular method of preserving the harvest is drying your crops. The reason drying works so well on crops is that it can make the flavor and texture a lot stronger, making your veggies a great addition to various dishes.

It is also relatively easier than other methods. All you have to do is wash and slice your crops and spread them on a tray to air them out. Once they have been aired, keep them out in the sun to let them dry out naturally. Once dry, use them like spices in your food while cooking or store them in canning jars or airtight containers.

Preserve Your Crops To Last All Year Long!

The first time you try to preserve your garden crops, it may seem like a daunting task.

However, once you start enjoying the endless supplies of home-made jams, pickles and fresh vegetables, you won’t be able to stop yourself from practicing food preservation next season too!

What is your favorite method of food preservation, and which technique tires you out the most?

We would love to know!

And in case you want to learn more about canning, don’t forget to check out the resources brought to you by Mrs. Wages.

Whether it’s a birthday, an anniversary, or a housewarming party – it is always thoughtful to bring a gift. But what do you present the DIY king or queen who makes their jams and preserves themselves?

We suggest going beyond the usual gifts and pay attention to their interests.

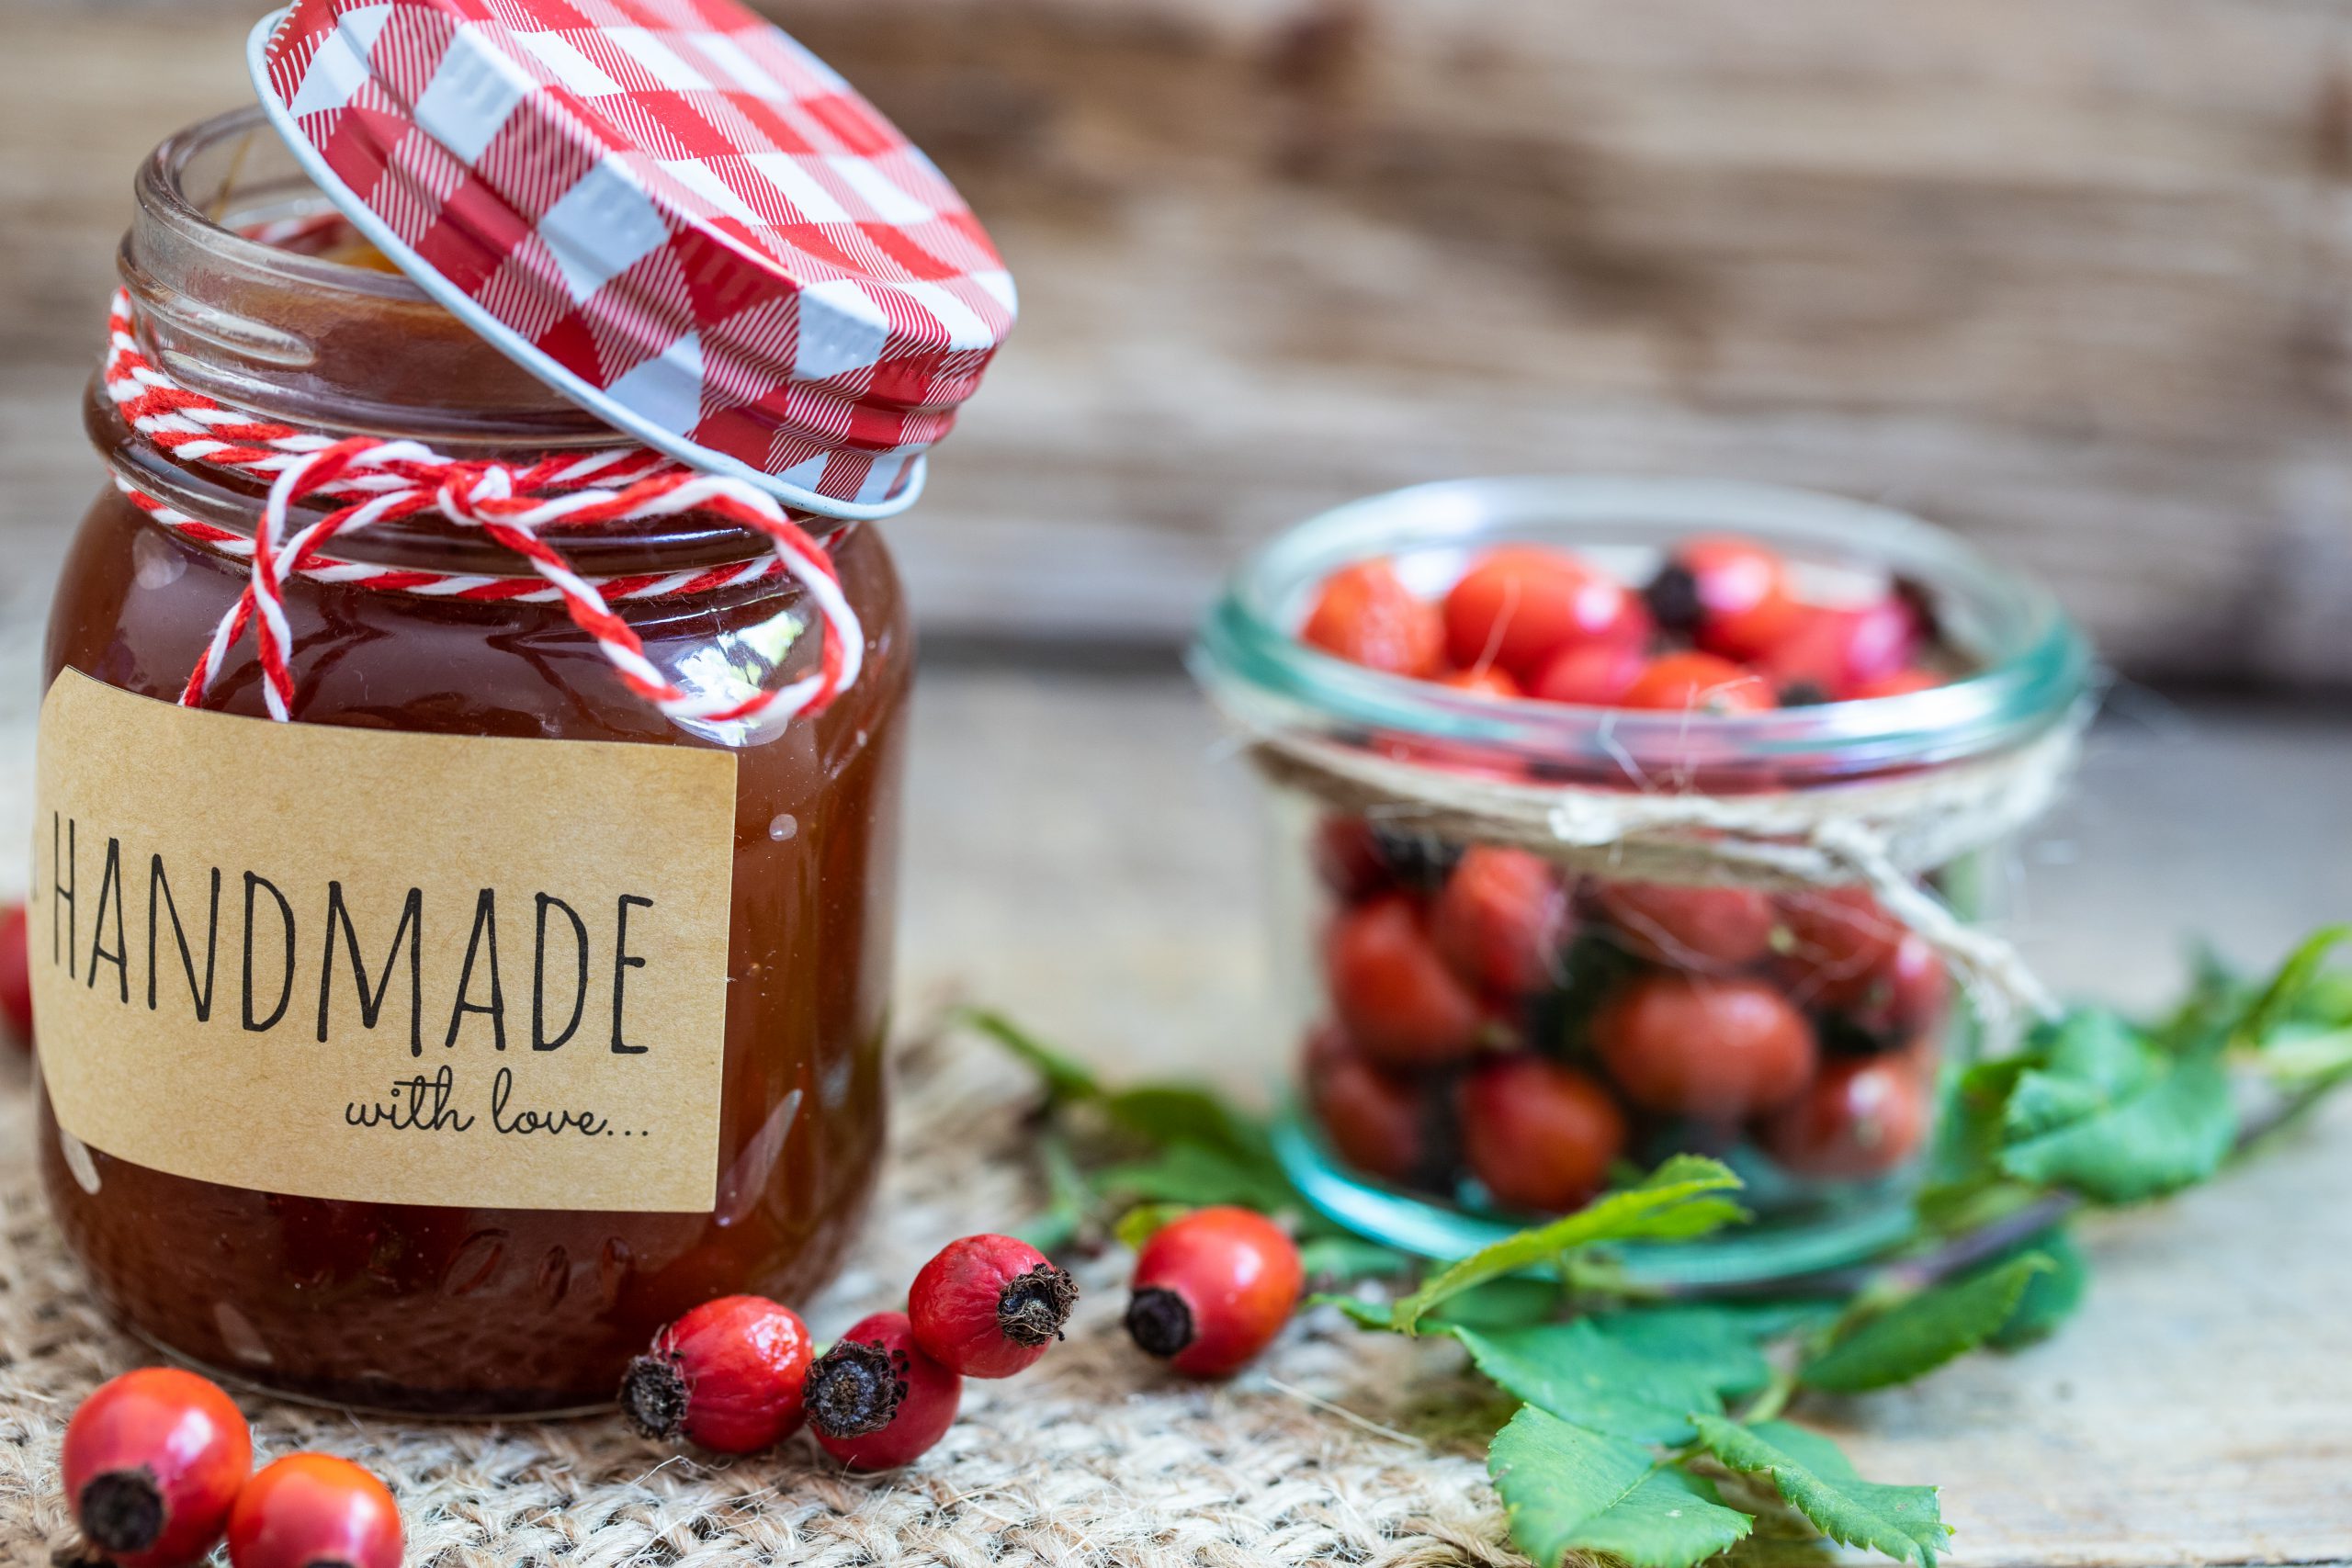
If you have a friend who’s obsessed with everything homemade and loves to make preserves of jam, chutneys and pickles, here is our list of gift ideas for them:

Customized Canning Labels

If you have a friend or family member who makes jams, pickles, and chutneys – gifting them a label maker for their specially curated food is a perfect gift!

A well-designed label that reflects the canned item is sure to make any canning-lover happy! You can either buy ready-made labels from shops or even design a pack of your customized labels online.

Weck Jars

Weck jars are a perfect gift for anyone who loves to give off their homemade jams and purees to everyone! These jars are minimal in style, foolproof against extreme temperatures and topped off with a glass lid that can render them an elegant look.

Given that these are a bit on the expensive side, however, the money spent is worth seeing smiles on your loved ones’ faces!

Pressure Canner

Suppose your canner-friend is an amateur and has just begun their journey into the art of food preservation and canning. In that case, chances are that he/she uses the water-bath method of processing (if you don’t know what that is, we got your back!) The majority of canners prefer to have a pressure canner that can make preservation quick and efficient.

It is also a very important thing for canners to preserve low-acidity foods like vegetables and meat.

Jar Lids

Any expert canner can tell you that while one can recycle jars time after time, lids are something that they’ll keep buying forever! Even if they have a significant collection of jars, putting new caps can help retain the freshness of the goodies inside the jar.

While brass and aluminum lids are most commonly used, it will be a hard pass for your canner to ignore a well-curated collection of colorful, single lids that can put an exciting twist to their jars.

Pro-Tip: Make sure to buy lids that are heat-resistant so they can come in handy during boiling-water canning.

A Premium Collection Of Seasonings And Preservers

Last but not least, a premium collection of all the necessary spices and seasonings that can bring out the creativity in your canning artist is the perfect gift for any season!

Whether they use the Instant Seasoning Mixes to add flavor to their salsa and guacamole or use them to make exciting pickles, a collection of artisanal products will be perfect for anyone who makes good food a priority.

To Conclude

A thoughtful gift can sweeten any home canner’s day.

Hopefully, this guide has given you some ideas for your canning-friend to bring a smile to their faces. If you find our guide helpful, be sure to share it with the world too.

For more guidance on canning and preserving your favorite foods, check out Mrs. Wages!

Canning was used to preserve foods before freezers became a standard fixture in every household. Many people still believe that it is the most effective method of conserving food as it retains the nutritional value of the food.

But now, many other elements also factor in when measuring the efficiency of both preservation methods. These include time, taste, texture, consistency, and spoilage of food, to name a few.

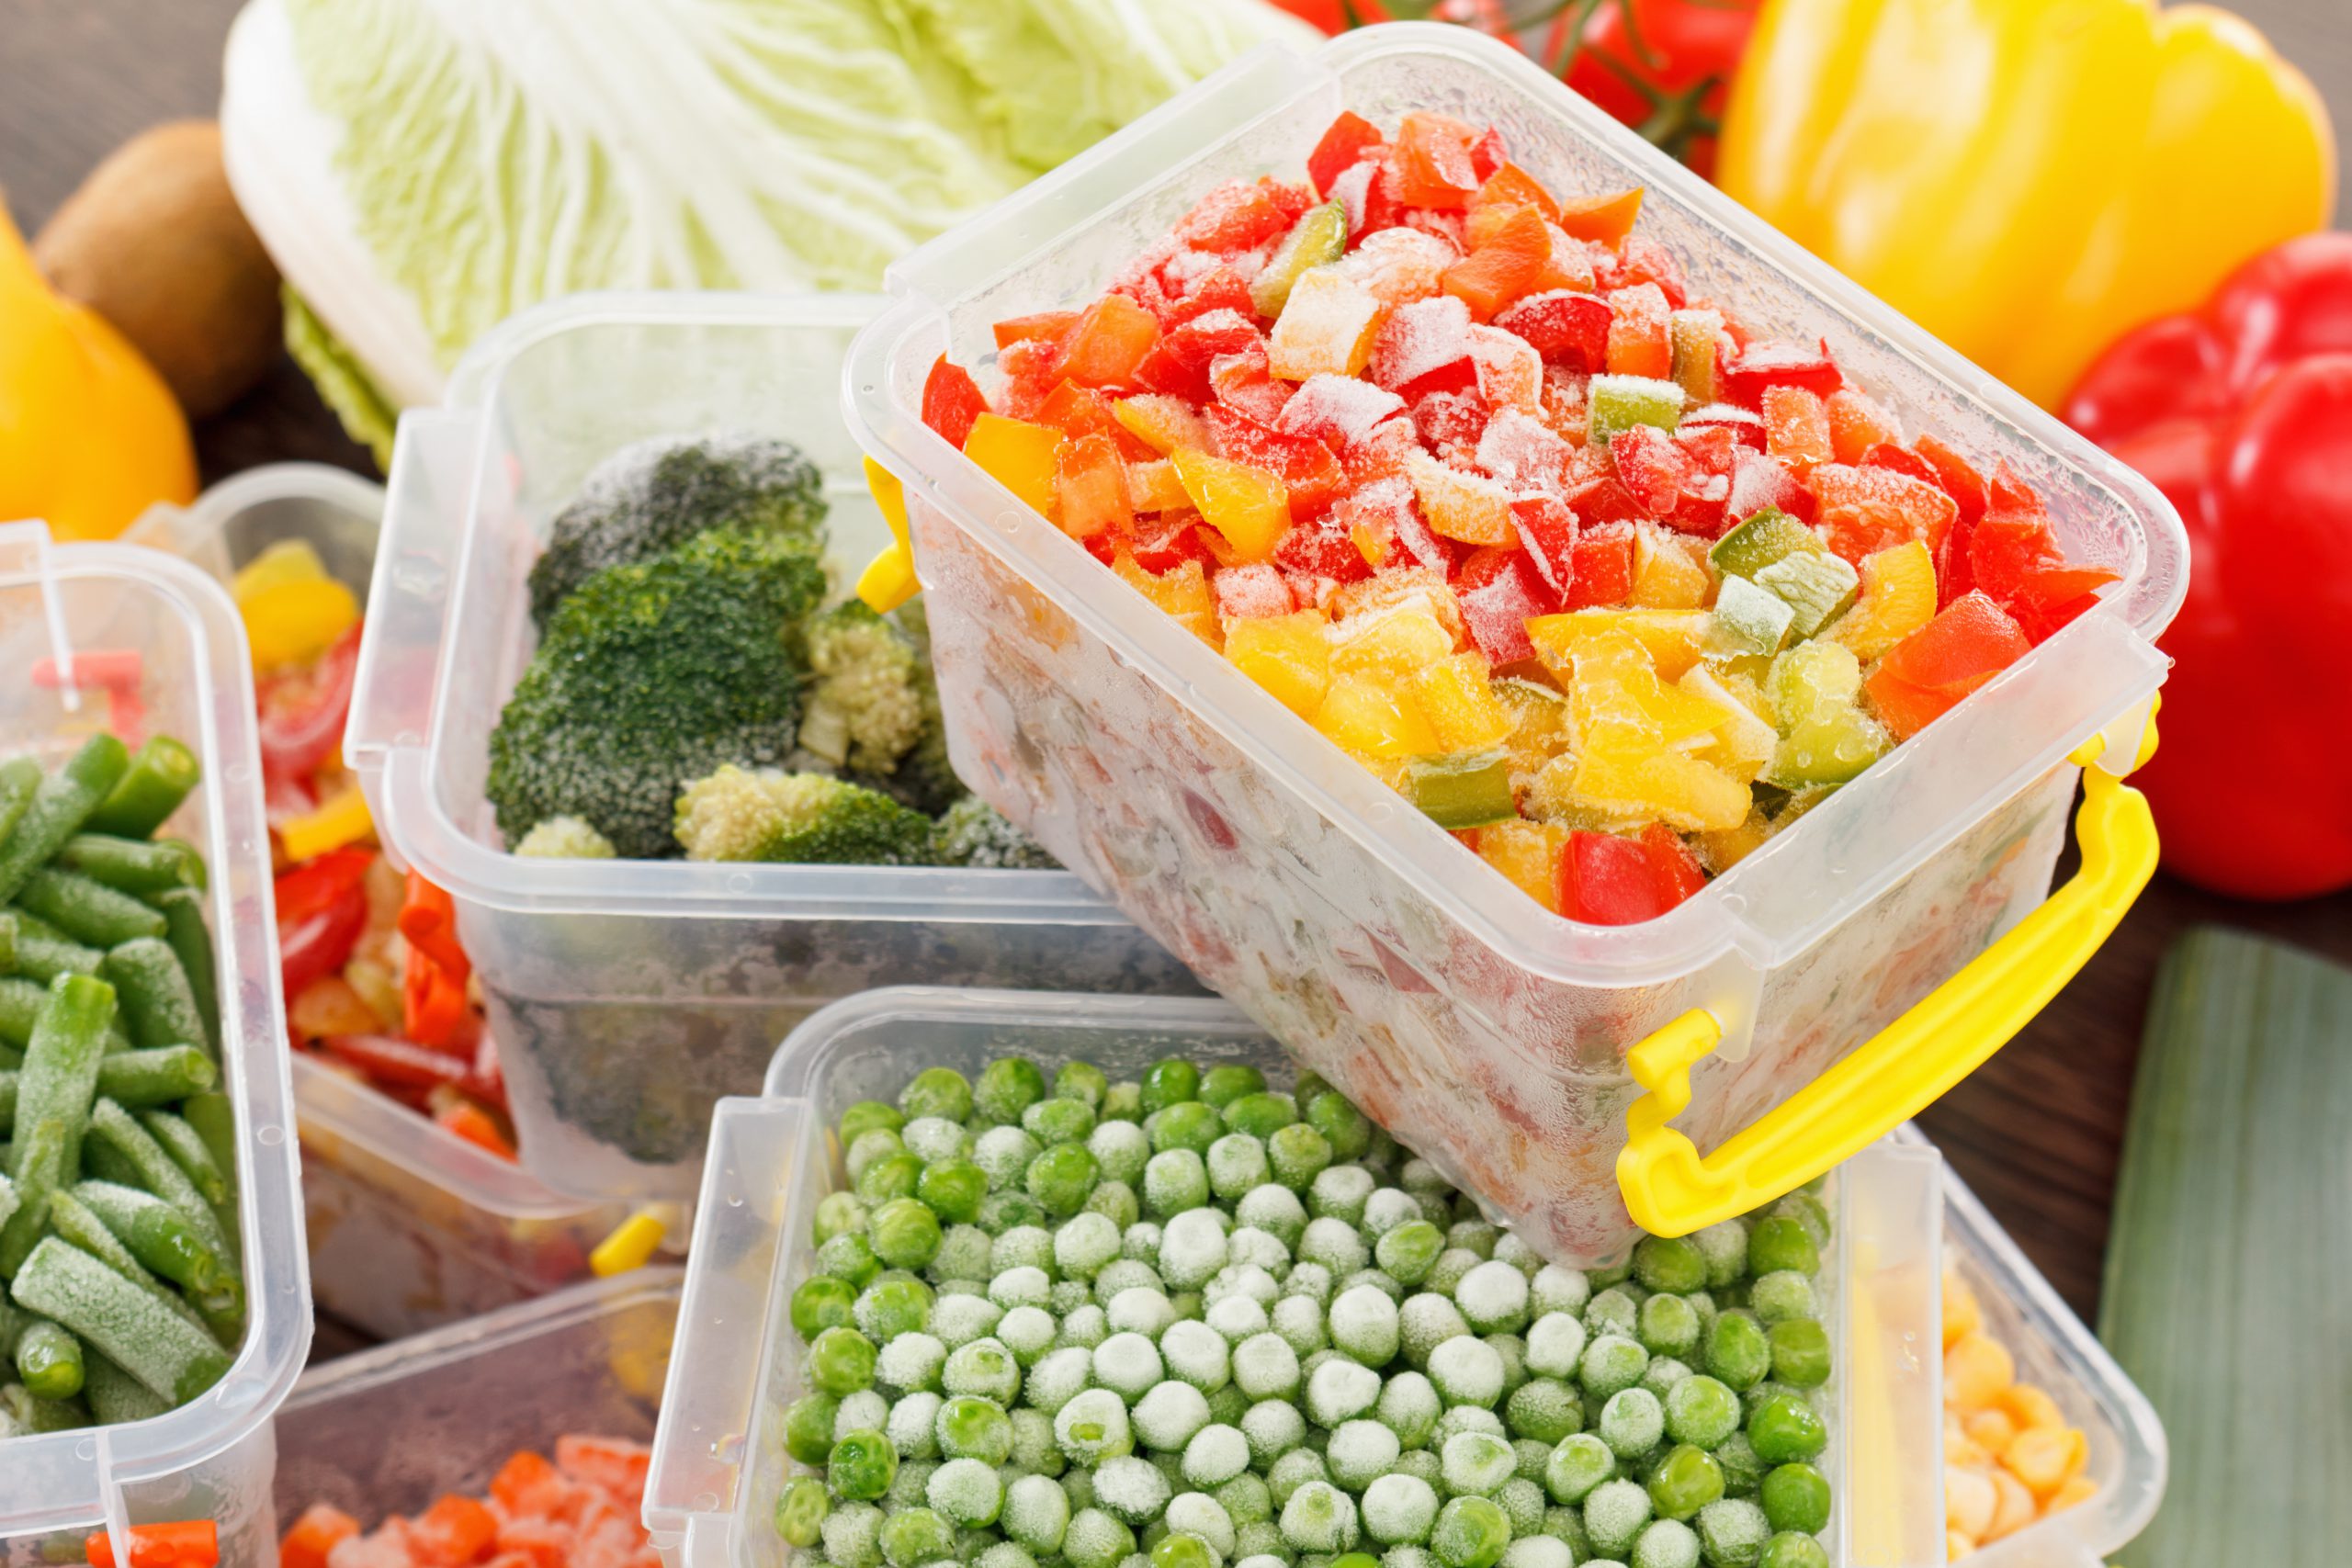
Canning and freezing both have their pros and cons, and if you are wondering which process is more viable, let’s find out.

Pros And Cons Of Canning

If you want to take advantage of this season’s harvest through canning, you need to know the pros and cons of this method:

Pros

Protects From Decay

Canning has potential effects on the moisture and pH level of your food. It alters the level of these factors to protect the food from bacteria and molds. Moreover, when these foods are placed in glass jars, the food is protected from further decay.

Besides, you can also use store bought preserver and pectins, (like these from Mrs. Wages) to maintain the color and flavor of your jams and jellies.

Saves Energy

Canned goods requires no extra energy to store, so you do not need to buy additional equipment or appliances. You can easily store the canned goods in the pantry.

Easy Storage

It is relatively easy to store canned products than whole fruits and vegetables. Simply place the canned jars on the shelf or stack them on top of each other if you are short on space.

Cons

Time-Consuming Method

Canning takes a lot of time as it involves several steps and processes and adequate preparation. Also, the time spent canning depends on the type of food being preserved.

Potential Issues

If canning is not done right, it can spoil the food you are trying to preserve. Improper sealing of jars, insufficient processing time, and the risk of botulinum contamination can be dangerous to your health.

Pros And Cons Of Freezing

Are you thinking about freezing your fresh produce? Here are several reasons why you should or shouldn’t use this method:

Pros

Easy To Do

Anybody can freeze anything as it is easier to learn than canning, and it requires less time and effort. All you need to do is appropriately package the food and place it in your freezer for the recommended time.

Safe Storage

Freezing food does not require you to use dangerous equipment or processes like boiling that increases the risk of an accident.

Long Shelf Life

The low temperature of the freezer saves your food from the growth of bacteria that might spoil your food.

Cons

Consumes Energy

Freezing uses a significant amount of electricity and you have to leave the freezer running 24/7 to keep the food safe. If you are conscious about your carbon footprint, freezing might not be the option for you.

Changes The Texture Of Food

Freezing can cause the formation of ice crystals on fruits and vegetables, which breaks down their skin resulting in loss of texture.

Freezer Burn

If not packaged correctly your food might get freezer burnt. Oxidation occurs and replaces moisture in the food which changes the taste and overall texture as well.

Which Is Better?

We can establish that both canning and freezing offer unique benefits when it comes to preserving food. Instead of going for a particular method, you can incorporate both of them to enjoy your produce all year-round.

As long as you have a reliable home canning guide to help you, canning can be just as easy as putting the food in the freezer. For more help with canning, count on Mrs. Wages® to help you. Visit the website for everything you need to know and buy to preserve food like a pro!

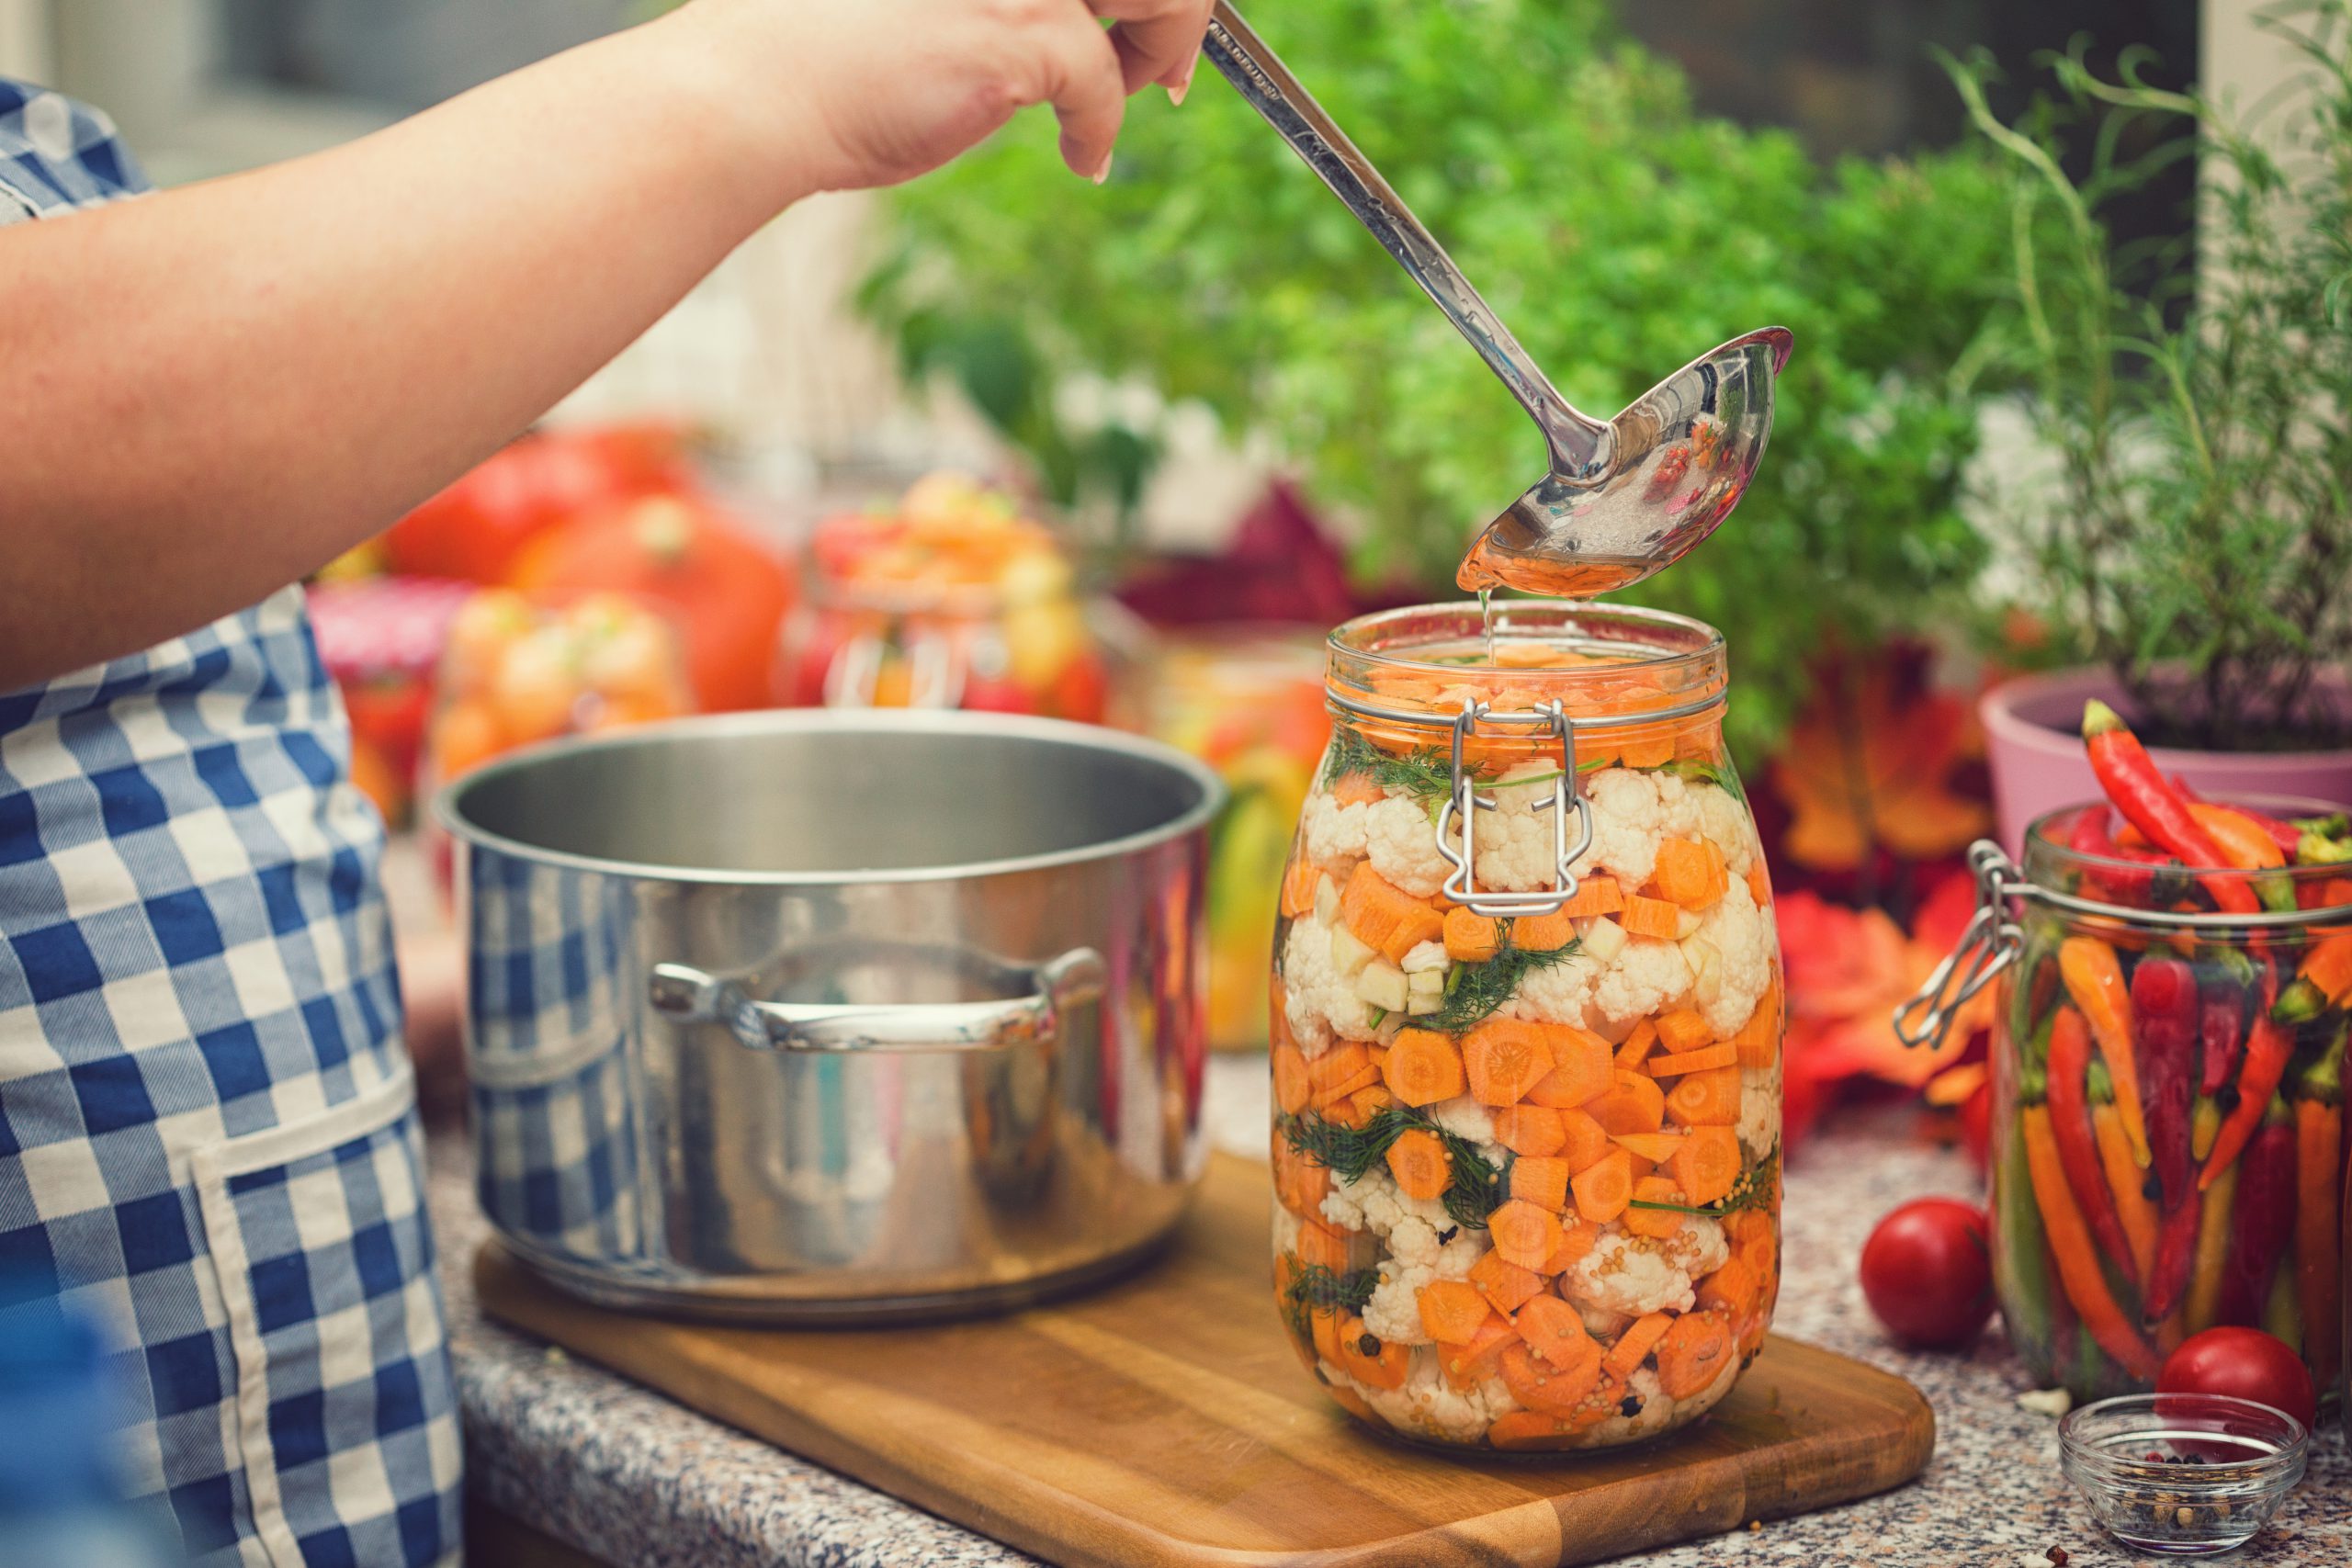
Home canning is an exciting hobby, but before you start on your journey to preserving foods and fresh produce on your own, you need to know how to do it correctly.

When it comes to low acid foods with a pH of 4.6 or above, pressure canning is the safest method. This is because low acid foods aren’t appropriately processed during water bath canning and so the spores of Clostridium botulinum bacteria survive boiling water.

These spores later grow in the sealed jars of water bath-canned low acid foods and produce a deadly toxin.

This is why low acid foods must always be pressure canned to eradicate the spores while canning the low acid fruits and vegetables.

But pressure canning can be an intimidating process for the uninitiated. That’s why we bring you these tips to help you maintain the quality of canned low acid foods.

Get A Good Quality Pressure Canner

Start by selecting an appropriate pressure canner with reliable build specs to ensure your safety and that of your food during the canning process.

Also, make sure that it is the right size for holding at least four quart jars and solely made for pressure canning.

While selecting the pressure canner, make sure that all its parts are working correctly. Inspect the rubber gasket and ensure that it’s soft and flexible. If you are using a dial gauge pressure canner, get it calibrated by a professional every year.

It may be a good idea to buy a brand new, modern pressure canner. These canners are safe to handle as they come with a pressure fuse that releases the pressure whenever it reaches a dangerous level inside the canner.

Process Low Acid Foods At 240-250 OF

The spores of Clostridium Botulinum can survive in boiling water until 212oF. With pressure canning, you need to maintain high temperatures of 240-250oF. But to attain these high temperatures, you need a pressure canner that operates at 10-15 psi.

Know that the speed at which your canner heats up might vary according to the kind of food you are canning, the size of jars, and how they are packed in the pressure canner.

Allow The Canner To Vent Once Pressure Builds Up

Once you have started the process and the pressure builds up inside the canner, it will begin to release it through the vent pipe while maintaining the high heat. You need to allow the venting process for 10 minutes to ensure that all air is removed from the jars as well as the canner. Then place the counterweight or weighted gauge on the vent pipe.

Let The Canner Depressurize On Its Own

When the canning time is up, stop the process, get it off the stove and let the canner to release the pressure on its own.

Do not speed up the depressurization process by running cold water on the canner or opening the vent to release the pressure quickly.  Forced cooling can result in the warping of the canner lid, liquid leakage from the jars, and ultimately food spoilage.

Conclusion

If you are new to the entire home canning process, the tips mentioned above can be of great help to you.

To ensure that you have the right equipment, and updated information on low acid food preservation, visit Mrs. Wages today.

Enjoy home canning!

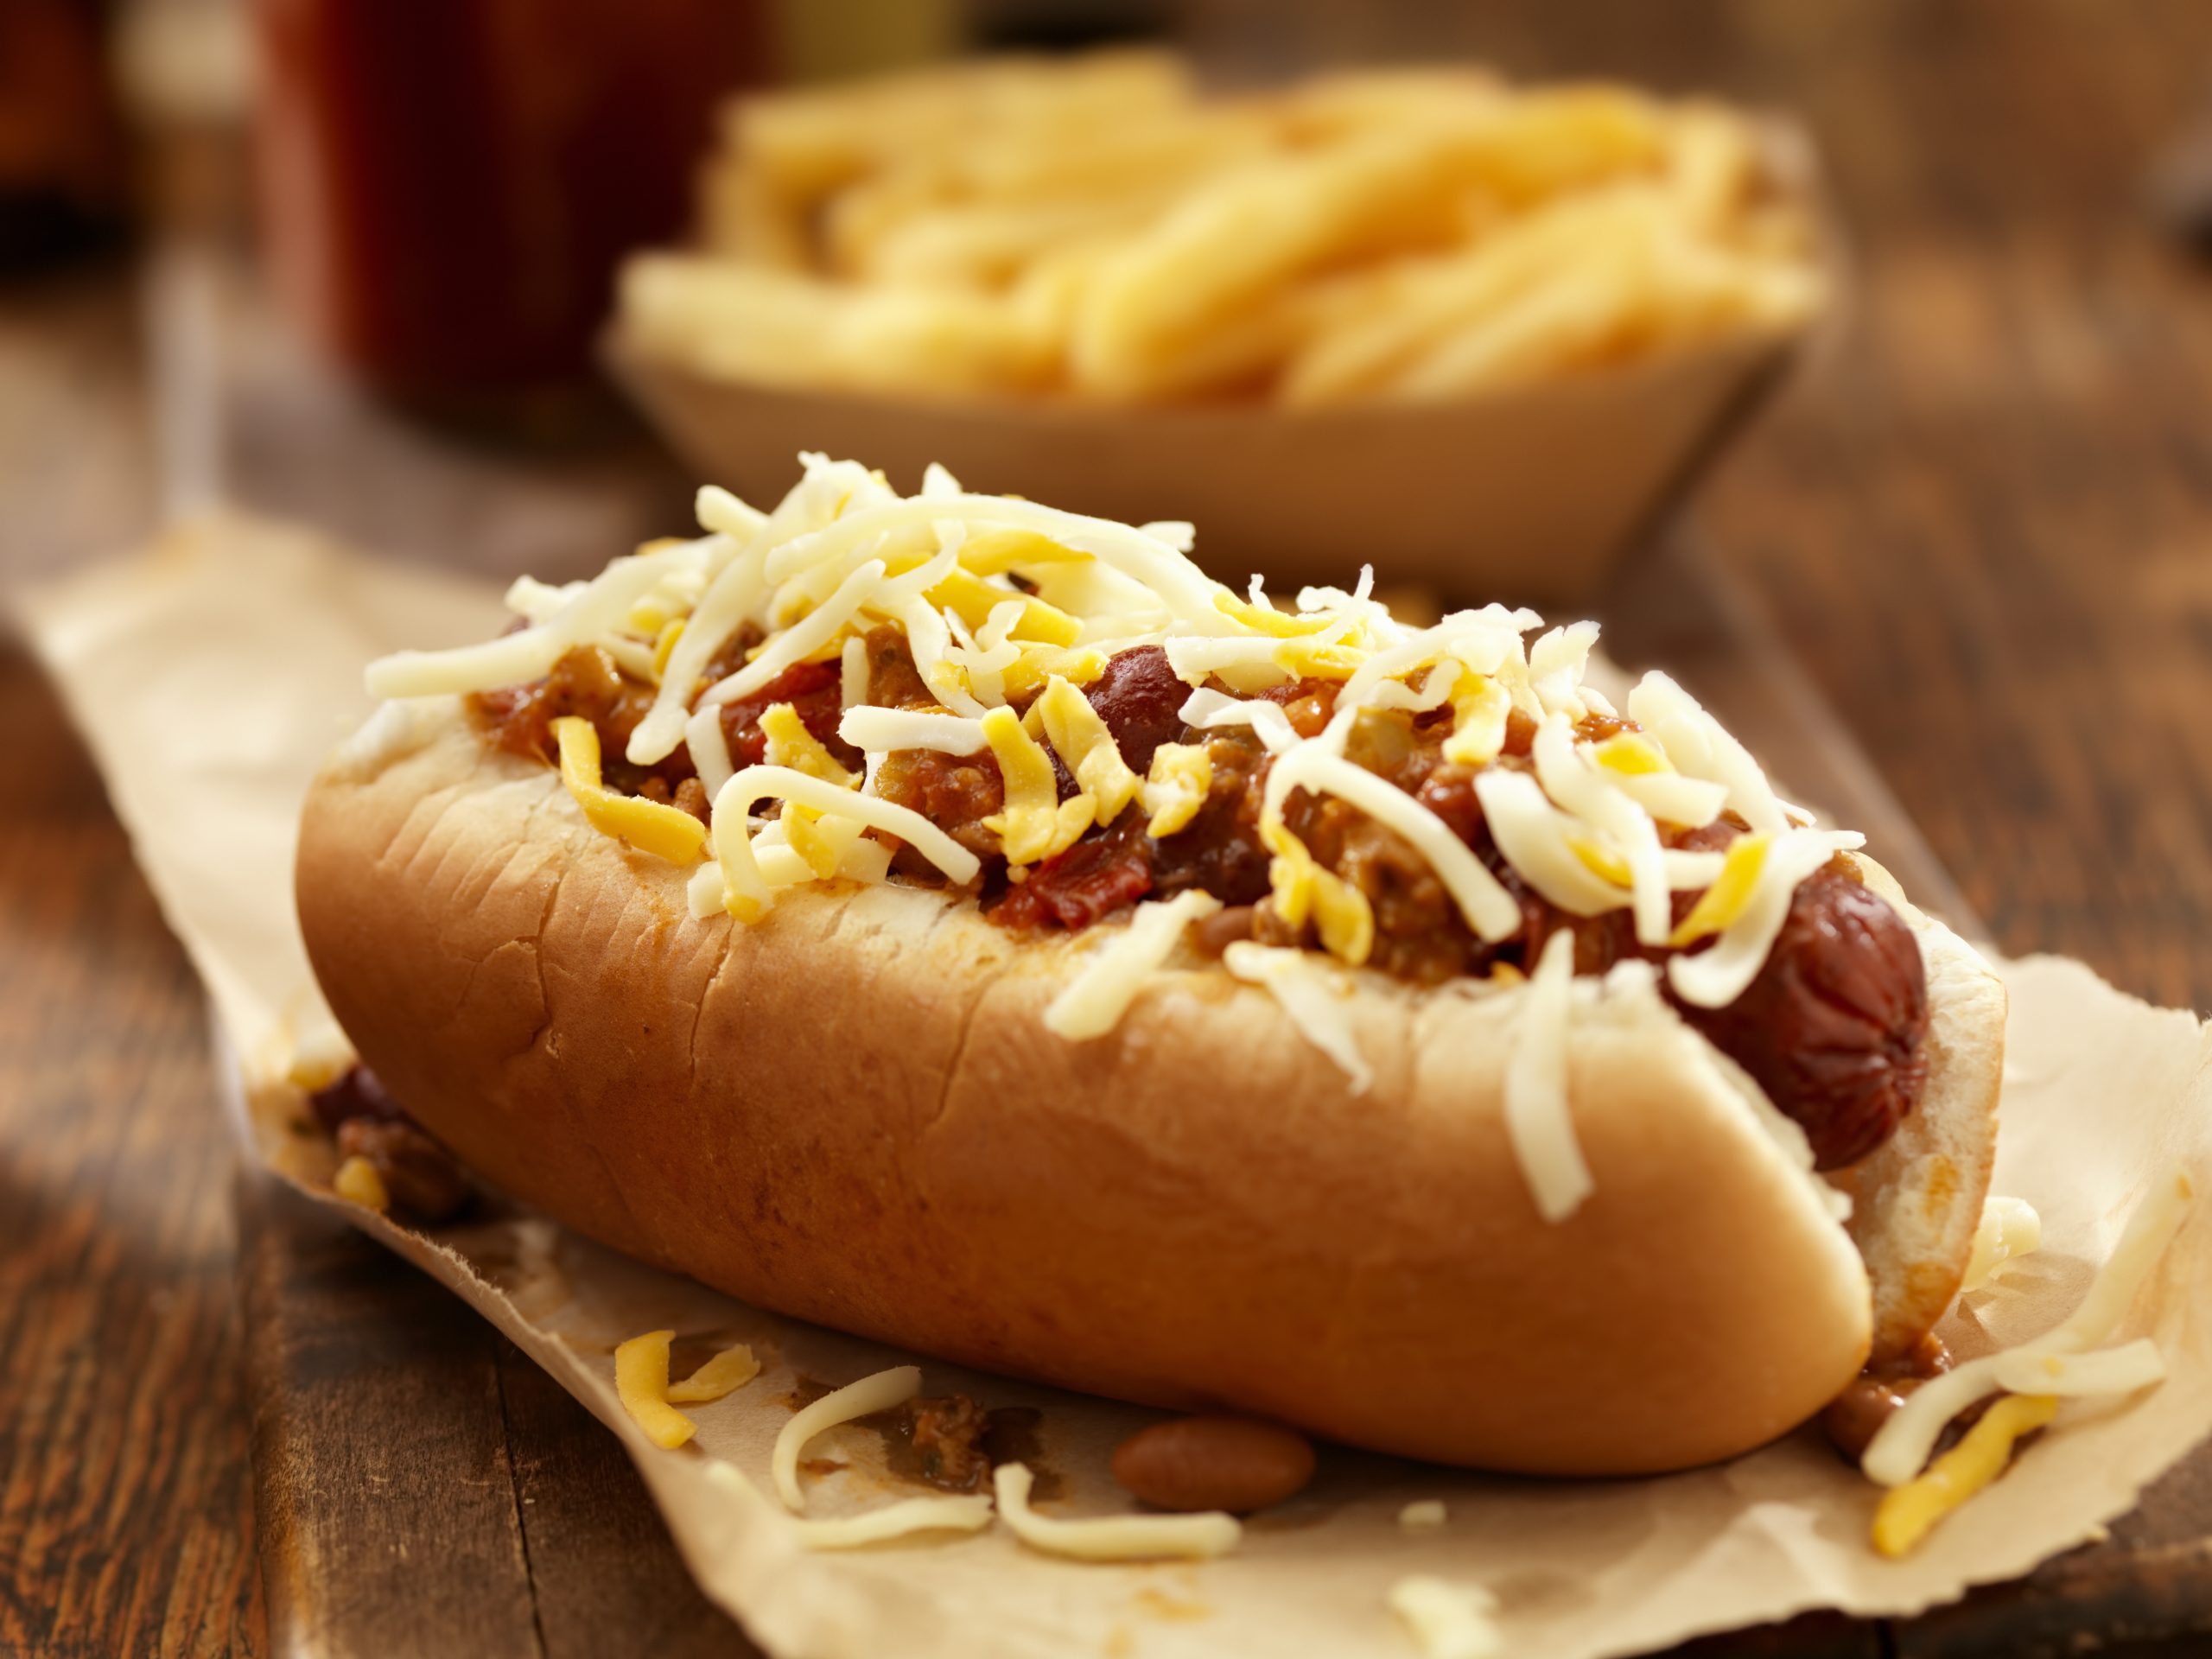
Dill pickles are a staple in every American household. A classic topping on burgers and hotdogs, dill pickles epitomize summer for everyone.

However, if you love to make them at home, the problem is that you may end up with soft, mushy pickles instead of perfect, crispy ones.

As much as we’d like, it’s not possible to prevent pickles from going soft, especially if you didn’t pay attention during the canning process.

If left in jars for extended periods, your pickles will eventually begin to get mushy. That’s why it’s important to get the canning process right and leave the cans airtight.

Here are some tips to ensure you get that perfect crunch every time.

How To Get Crispy Dill Pickles Every Time

Choose The Right Pickles

Whether you buy them at the store or grow your own pickles, get fresh cucumbers that have the words ‘pickle’, ‘pickler,’ or ‘pickling’ in their name. Your local farmer’s market can help you find the right kind.

If you grow cucumbers yourself, try processing them the same day you plan on canning them. If you buy cucumbers from the store or farmer’s market, try asking the grocer how fresh they are and when they were picked.

Rubbery looking cucumbers should be avoided because there’s nothing you can do to save them. The best type of cucumber is a slightly curved one, that’s firm to touch and has a fresh green color.

Lastly, the smaller the cucumber, the crispier it’ll be when it pickles. Smaller and younger pickles tend to have fewer seeds as opposed to older, longer ones that also tend to get softer. More importantly, pick pickles that are all the same size when canning.

Soak Cucumbers In Ice Water Beforehand

If you’re not canning your cucumbers immediately, leave them in an ice bath or in your refrigerator overnight to maintain firmness.

Doing this before you start canning them will give you the crunchiest pickles you’ve ever had!

Cut The Blossoms Off

Cut off around a quarter of an inch of the cucumbers from the blossoming side as it contains enzymes that may cause it to soften during the canning process.

If you’re confused about which side is the blossom, cut off both ends.

Add Tannins

Adding natural tannins such as grape leaves, black tea, or oak leaves can delay the softening process and keep your pickles firm. This is entirely optional and only works if your cucumbers aren’t already soft.

Find Some Pickle Mix

Many pickle canners now buy ready-made pickle mixes to ensure that they get the best, crispiest possible pickles. Although it sounds daunting, these products are completely harmless and create flavors everyone will love! Combine the ready-made pickle mixes with Mrs. Wages® Xtra Crunch™ to achieve the crispiest pickles.

The calcium chloride reinforces the cell walls in the pickles, keeping them sturdy throughout the canning process. This is also optional but is a sure shot way to guarantee perfectly crisp pickles when canning at home.

In Conclusion

It’s important to remember that these bits of advice will only delay the softening of your pickles, not permanently stop it. So make sure you don’t can too many cucumbers at a time, to enjoy the crunchiest, crispiest canned pickles all year round.

Also, try to make sure the jars are consumed within six months, at least.

Ever wish you could store batches of your famous jam for months? Maybe you have a child going away to college, and you wish there were a way to make sure that they have your home-cooked meals every night?

Well, let me tell you about a cost-effective, environmentally friendly, and healthy answer to your prayers.

Canning food is the process of storing food in airtight containers. But before that, it is heated to a temperature where all harmful bacteria and microorganisms die so you can quickly cover and preserve it in pristine condition.

Then open up the can whenever the mood strikes you and enjoy fresh jams, jellies, marmalades, and other eatables right out the container!

When Does Homemade Canned Food Go Bad?

Well, let us tell you that if preserved correctly, homemade canned foods won’t go bad ever! But realistically speaking, it can last for at least 2 to 5 years easily without compromising on the taste or nutritional value.

Several factors affect the shelf life of canned foods, but the general rule is that highly acidic foods (pickles, juices, tomatoes, and all kinds of fruits) expire sooner than low-acid canned items (canned poultry, stews, pasta and meat, etc.) that can last a lot longer.

Just make sure to throw the cans away if they start to bulge, leak, or get rusty. Also, remember to store them in a cool and dry place away from dampness to ensure that your cans of food last for several years at a stretch.

Rest assured that your canned foods are preserved safely in a vacuum environment and will be safe to consume even after 2 years.

Benefits Of Canning Your Food

Canning is a time-tested method of preserving food that is safe, affordable, and doable at home.

If practiced properly, there are many benefits to canning your own food, such as:

Canning Food Saves You Money

By growing your own food and then canning it, you’re guaranteeing it’s availability for months, while also ensuring that your crop never has to go to waste.

Even if you buy the produce instead of growing it, why not buy in bulk when fruits and vegetables are in season to can them? This way, you can have your favorites all year long without spending too much on buying out-of-season produce.

Environmentally Friendly Option

The mason jars used in canning foods are reusable and do not cause any waste. With just a little bit of effort, you can have a non-stop supply of soups, pickles, vegetables, and even meat.

This way, you can be sure that you are doing your part by saving energy, reducing waste, and sealing in nutrients that ensure your health and vitality.

Nutritious Fresh Food All Year Round

Canned foods are just as nourishing as fresh and frozen foods because the canning process preserves the nutrients while also keeping the food safe from bacteria.

The vitamins, proteins, minerals, and carbohydrates remain unchanged during the process, so no matter when you decide to eat it, rest assured you are getting a healthy, delicious meal.

So, if you want to save money, be environmentally conscious, and enjoy great food year-round, start canning it!

Do you source your fruits and vegetables from your farm or buy in bulk to get the best rates? Are you looking for ways to preserve them, so they last way past their shelf life?

Try canning them – canned food can be kept safe for a very long time as it is impervious to contamination. This way, you can have flavorsome, nutrient-rich food anytime you please.

Each canned item can last for at least several years, depending on the food type and how good your canning technique is.

What Type Of Food Can Be Canned Safely?

Canning is one of the oldest techniques for food preservation, and it has been used to preserve all kinds of jams, jellies, and condiments. Here are some top food items that are often found canned:

Fruits

Use the bath canning method to preserve tomatoes, jams, jellies, pickles, fruits, and much more! The method works best because of the acidic profile of these foods — they have a pH level of 4.0 or below.

This method guarantees that there is no chance of food being infected with clostridium botulinum spores.

Remember, if the selected fruits have a pH level of 4.0 to 4.6, you’ll have to add citric acid or lemon juice to the jar to ensure long-term freshness.

Condiments

Pickles, sauces, relish, vinegar, and many other condiments can be preserved in a can by using the same water bath method.

Also, since most of these condiments have a vinegar base that automatically reduces the risk of spoilage by bacteria as the acid levels remain consistently high.

Meat And Vegetables

Whether you like dried jerky or buy meat, vegetables, poultry items, etc. in bulk — canning them can help you preserve them for good. This way, you can have a steady supply of meat products all year long, despite them having a short shelf life.

We recommend you to use a pressure canner to do the job, instead of the bath method.

Like a pressure cooker, the pressure canner has a unique locking mechanism that keeps the lid secure. The pressure gauge lets you select the appropriate pressure to be applied to the items within the container.

Check the manual to know the ideal pressure, heat, and time settings for your canner — these may differ by the type of food getting canned.

Key Takeaway

Home canning can be a productive and enjoyable hobby. Not only do you get to preserve food for the future, but you also experience considerable savings.

Additionally, you can enjoy fresh, seasonal flavors all year round, and canned soups, stews, and sauces, etc. make for great gifts as well.

Long story short, you can preserve a good number of different food types with the right method. For instance, canning can be done to enhance the shelf life of hamburger patties, bacon, chicken thighs and legs, pot roast, hot dogs, cheese, butter, etc.

But you have to have sound knowledge of what you’re doing by considering the pH level of the food. We can help ensure that you always make the right call when it comes to canning.

Land o Lakes

And follow us on your favorite social media apps: